What is Galileo?
Evaluate, Observe, and Protect your GenAI applications
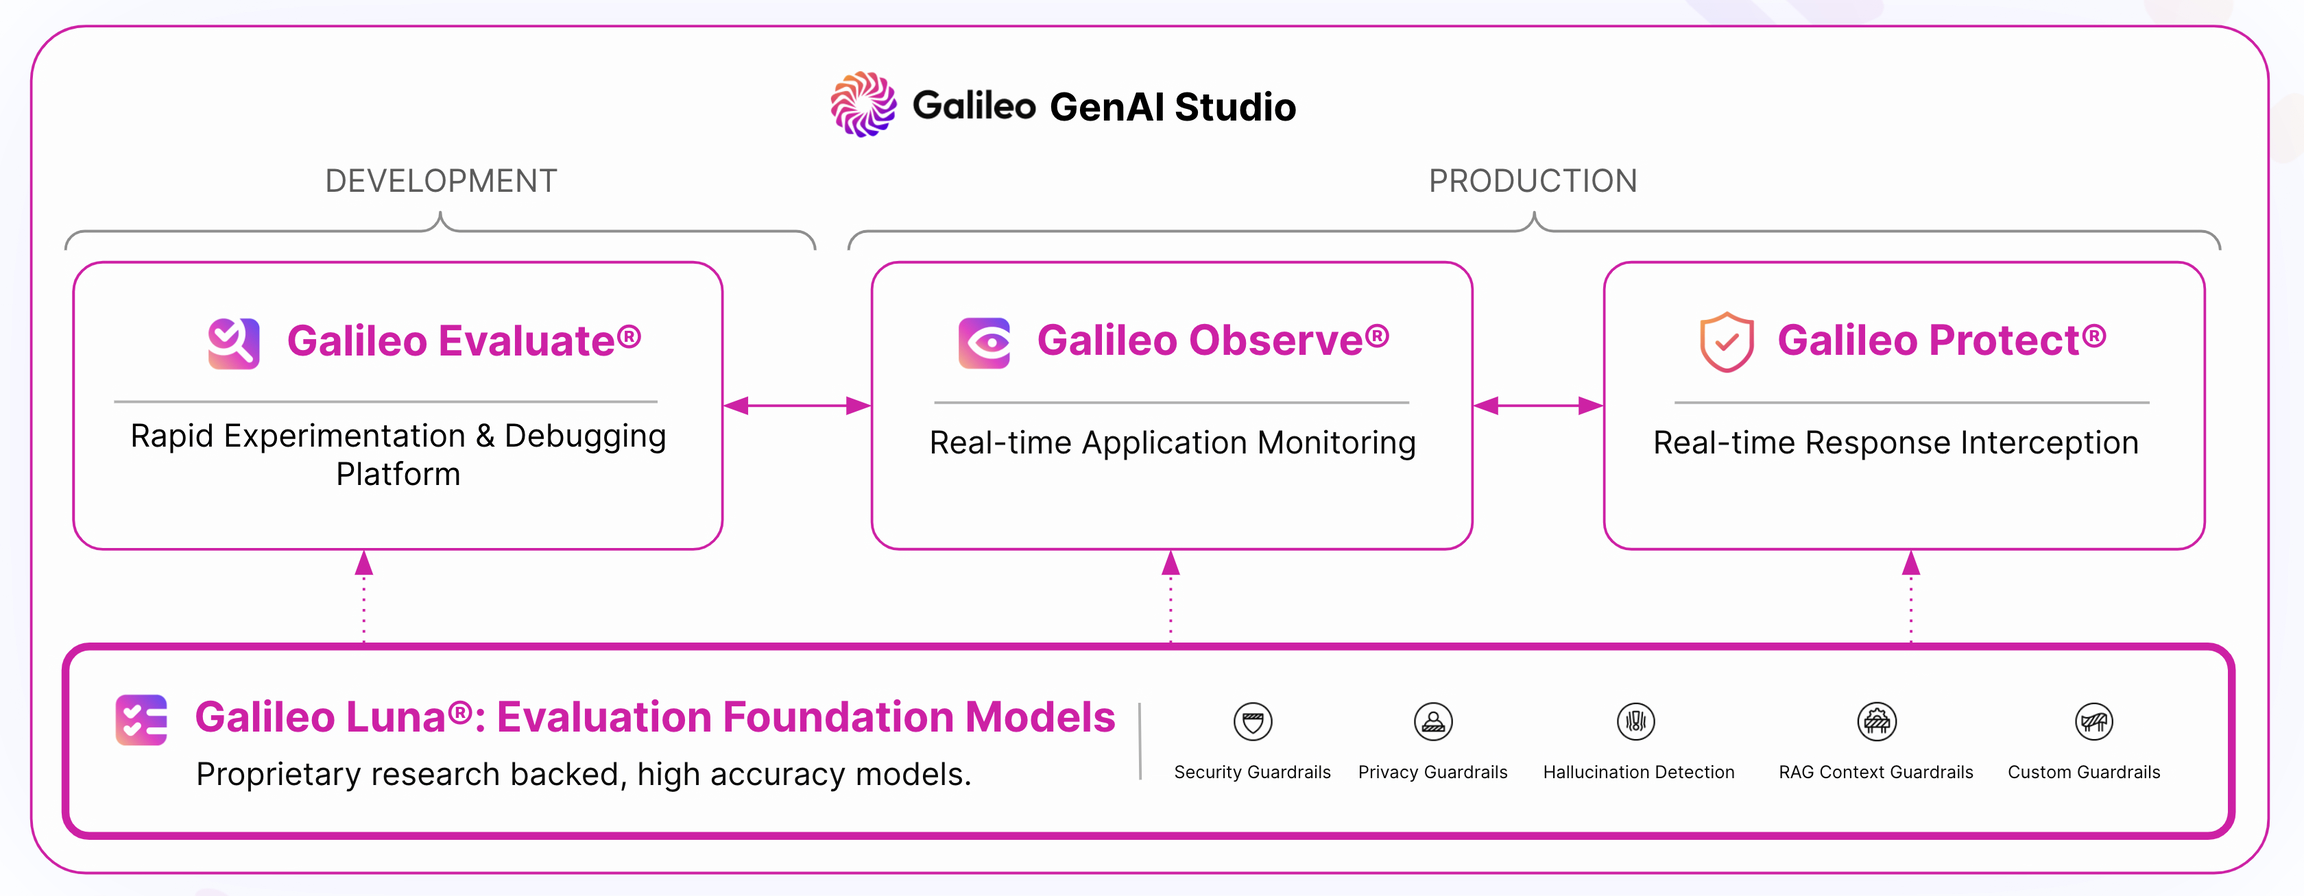
Galileo is the leading Generative AI Evaluation & Observability Stack for the Enterprise.
Large Language Models are unlocking unprecedented possibilities. But going from a flashy demo to a production-ready app isn’t easy. You need to:
- Rapidly iterate across complex prompts, numerous models, context data, embedding model params, vector stores, chunking strategies, chain nodes and more — getting to the right configuration of your ‘GenAI System’ for your use case needs experimentation and thorough evaluation.
- Carefully keep harmful responses away from your users, while keeping harmful users from attacking your GenAI systems.
- Monitor live traffic to your GenAI application, identify vulnerabilities, debug and re-launch.
Galileo GenAI Studio is the all-in-one evaluation and observability stack that provides all of the above.
Metrics
Most significantly — you cannot evaluate what you cannot measure — Galileo Research has constantly pushed the envelope with our proprietary research backed Guardrail Metrics for best in class:
- Hallucination detection (see our published Hallucination Index) ,
- Security threat vector identification,
- Data privacy protection,
- and much more…
Modules
The GenAI Studio is composed of 3 modules. Each module is powered by the centralized Galileo Guardrail Store.
Get started with:
Evaluate
Rapid Evaluation of Prompts, Chains and RAG systems
Observe
Real-time Observability for GenAI Apps and Models
Protect
Real-time Request and Response Interception